
Understanding Your Small Space Needs for a Mudroom Bench
Creating a functional mudroom bench in a small space requires thoughtful planning before you pick up any tools. Limited spaces typically refer to entryways or hallways that are less than 5 feet wide, where every inch matters. These tight areas present unique challenges but also opportunities for custom solutions that store-bought options simply can’t match.
Small entryways often struggle with several common limitations:
- Narrow pathways (typically 3-5 feet wide)
- Limited wall space for traditional storage
- Doors that swing into the available area
- Awkward corners or architectural features
- The need to accommodate multiple family members’ belongings
The beauty of designing your own mudroom bench is that you can tailor it precisely to your space constraints. While standard benches typically require 12-18 inches of depth, a custom solution allows you to work with whatever space you have available while maximizing functionality.
Before starting your project, understanding how transform entryway space-saving benches can dramatically improve both organization and aesthetics will help guide your design decisions. Looking at various mudroom benches can provide inspiration for the perfect solution that addresses your specific spatial challenges.
How to Measure and Plan Your Limited-Space Mudroom Bench
Accurate measurements are the foundation of any successful small-space project. Start by measuring the total available width, depth, and height of your potential bench area. Use a tape measure to record:
- Width: Measure the wall space where the bench will sit
- Depth: Measure from the wall outward (remembering that 12-16 inches is typical for comfortable seating)
- Height: Standard bench height is 17-19 inches for comfortable sitting
When dealing with narrow hallways or entryways, always maintain at least 36 inches of clear pathway for comfortable traffic flow. For areas with doors, allow approximately 30 inches of clearance for interior door swings.
Examine your walls and floors carefully. Look for studs in the walls (typically 16 inches apart) for secure anchoring. Check if floors are level, as uneven surfaces may require adjustments to your design.
Sketch your space on graph paper, noting all measurements, doorways, windows, electrical outlets, and other fixed elements. This visualization helps identify the most efficient design for your specific constraints.
For extremely tight spaces, exploring narrow entryway bench designs can provide valuable insights into how to maximize functionality while minimizing footprint.
7 Space-Saving Mudroom Bench Designs Perfect for Small Areas
Slim-Profile Bench (10-12 inches deep)
– Perfect for very narrow hallways
– Provides seating without protruding too far into walkways
– Typically holds 200-250 pounds despite slim profile
– Best for quick shoe changes rather than extended sittingCorner L-Shaped Bench
– Utilizes often-wasted corner space
– Maximizes seating and storage in angular areas
– Creates more storage volume than straight benches
– Requires precise measurements and angle cutsFloating Wall-Mounted Bench
– Creates illusion of more floor space
– Eliminates legs that can make cleaning difficult
– Typically supports 250-300 pounds when properly mounted
– Requires secure attachment to wall studsUnder-Window Bench
– Makes use of often-underutilized space
– Natural light makes the area more inviting
– Height may need customization based on window placement
– Can double as display space for plants or decorative itemsStair-Adjacent Bench
– Transforms awkward stairway space into functional storage
– Can utilize triangular or graduated height designs
– Often includes built-in shoe storage underneath
– Creates a natural transition zone between levelsBuilt-In Alcove Bench
– Fits flush between existing walls
– Creates a cohesive, intentional look
– Maximizes every available inch
– Can be customized to unusual dimensionsConvertible/Foldable Bench
– Expands when needed, compacts when not in use
– Perfect for extremely limited spaces
– Allows flexibility as needs change
– Slightly more complex to build but highly versatile
For challenging corner spaces, corner entryway bench designs offer specialized solutions that make the most of these typically underutilized areas. For additional creative approaches, exploring space-saving entryway ideas can provide further inspiration for your project.
Choosing the Right Materials for Your Small-Space Bench Project
The materials you select impact not just the appearance of your bench, but also its durability, weight capacity, and suitability for a mudroom environment where moisture is common.
| Material | Cost | Weight | Durability | Moisture Resistance | Ease of Work |
|---|---|---|---|---|---|
| Pine | $ | Light | Moderate | Low-Moderate | Very Easy |
| Oak | $$$ | Heavy | High | Moderate | Moderate |
| Plywood | $$ | Moderate | Moderate-High | Varies by grade | Easy |
| MDF | $ | Heavy | Moderate | Poor | Very Easy |
For small spaces, plywood often provides the best balance of strength, cost, and workability. Three-quarter inch plywood offers excellent stability for bench seating while half-inch works well for side panels and dividers. Select cabinet-grade plywood for visible surfaces to minimize filling and sanding.
When choosing finishes, lighter colors and semi-gloss or satin finishes can make small spaces appear larger. Consider using water-resistant polyurethane or marine-grade finishes for areas likely to encounter wet shoes or clothing.
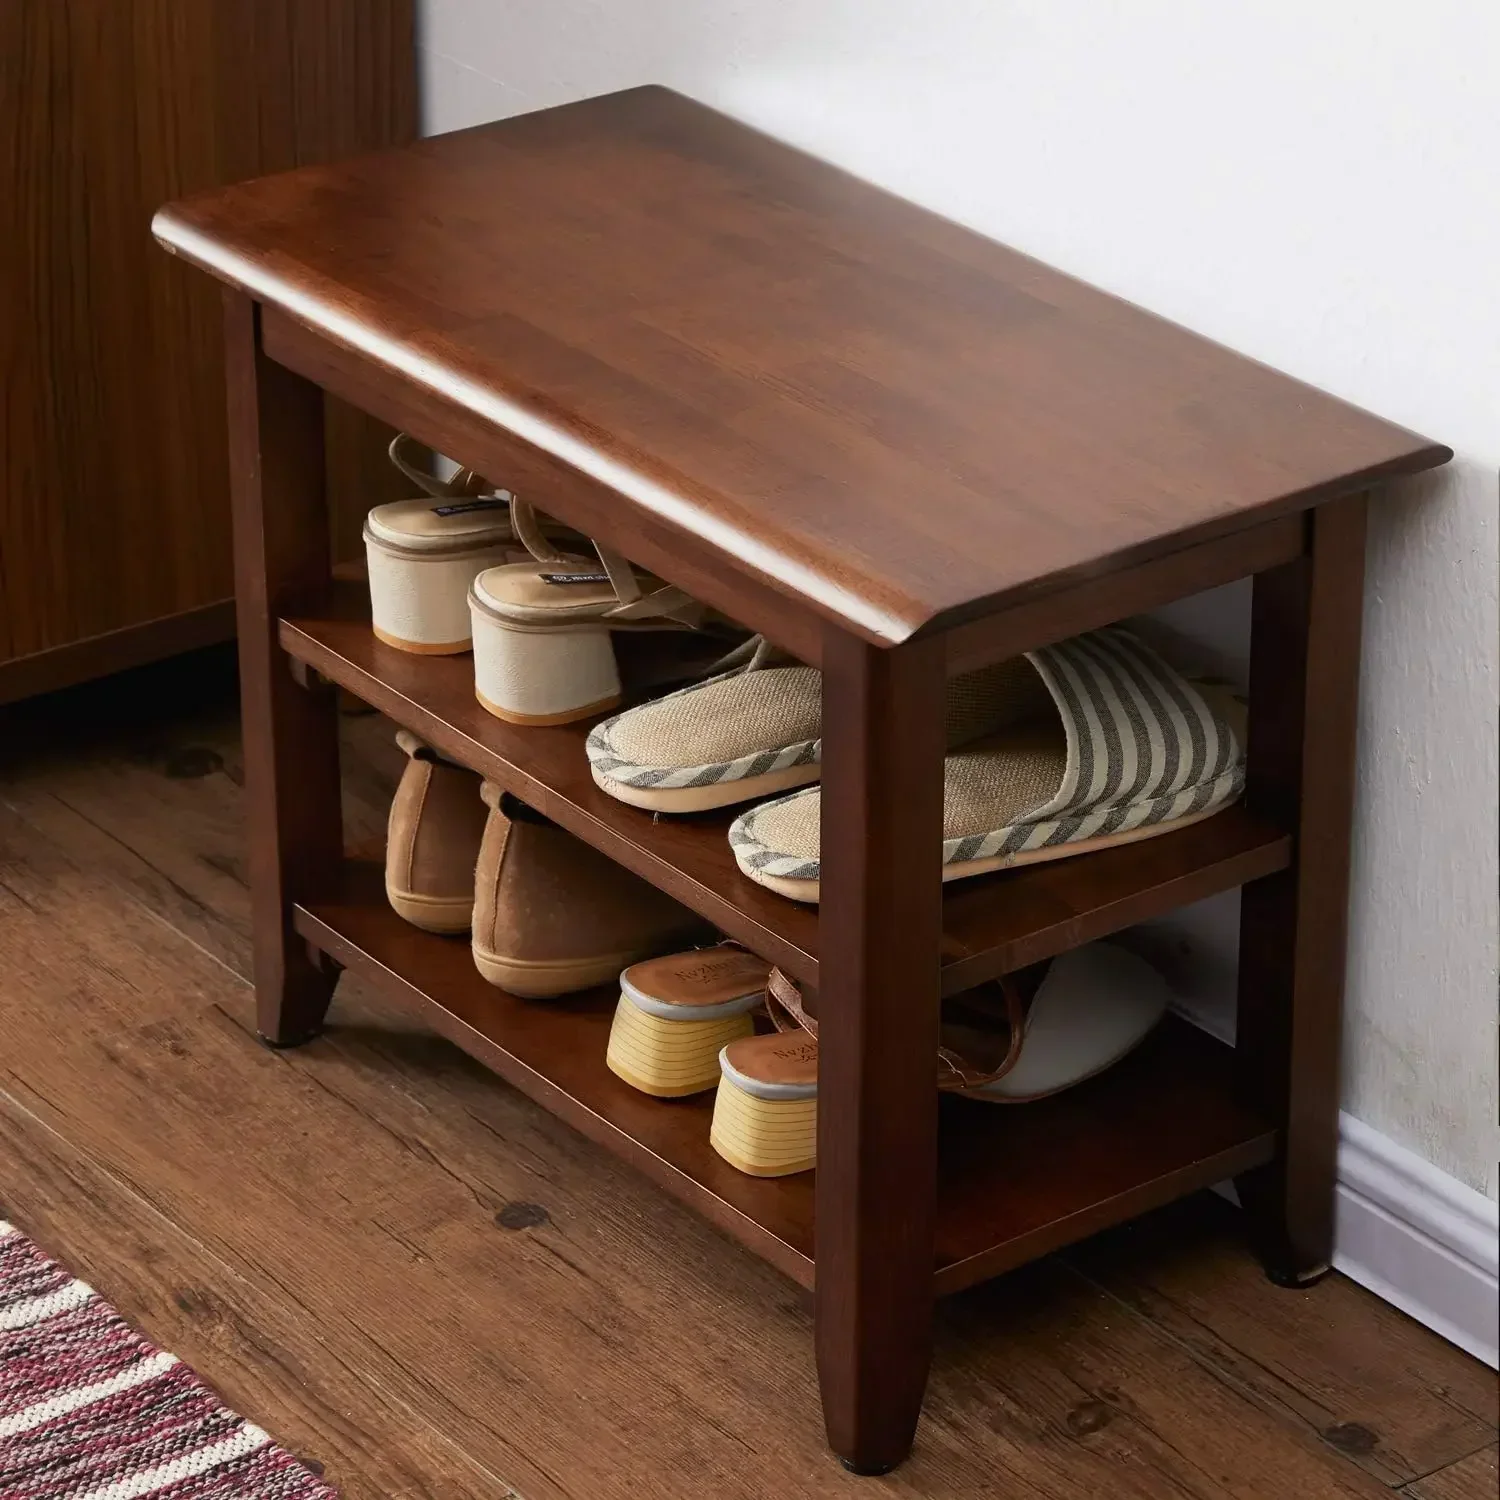
For visual inspiration and material ideas, exploring wood mudroom bench options can help you visualize how different materials might look in your finished project.
Essential Tools and Workspace Considerations for Limited Areas
Creating a mudroom bench in a small space often means working in limited conditions. Here are the essential tools you’ll need:
- Measuring tape and level
- Circular saw or miter saw
- Drill with various bits
- Kreg jig or pocket hole system
- Sander (orbital preferred)
- Stud finder
- Basic hand tools (hammer, screwdrivers, clamps)
If your workspace is limited, consider these alternatives:
* Handsaw with miter box instead of power saw
* Manual screwdriver with pre-drilled holes instead of power drill
* Sand by hand using sanding blocks
Creating a temporary workspace is often necessary for small-home DIYers:
* Use sawhorses with plywood top in a garage or outdoor space
* Consider a portable workbench that folds away after use
* Protect floors with drop cloths if working indoors
* Use dust collection systems or work outside when cutting
Safety becomes even more important in confined spaces:
* Ensure proper ventilation when applying finishes
* Use protective eyewear and breathing protection
* Keep tools organized to prevent trips and falls
* Consider cordless tools to eliminate tripping hazards
Learning how to organize small entryway bench spaces efficiently will help you plan not just the build process but also how the final product will function in your home.
Step-by-Step Tutorial: Slim-Profile Mudroom Bench for Narrow Hallways
This slim-profile bench design is perfect for narrow hallways while still providing essential storage and seating. The finished dimensions will be 36” wide × 12” deep × 18” high.
Materials Needed:
– 1 sheet of 3/4” plywood
– 1×3 pine boards (8 feet)
– 1×4 pine boards (6 feet)
– 1 1/4” pocket hole screws
– 2” wood screws
– Wood glue
– Sandpaper (120 and 220 grit)
– Primer and paint or stain and polyurethane
– Wall anchors rated for 50+ pounds
Step 1: Cut Your Pieces
– Bench top: 36” × 12” (from 3/4” plywood)
– Side panels: 17 1/4” × 11 1/4” (from 3/4” plywood, 2 pieces)
– Shoe shelf: 33” × 10” (from 3/4” plywood)
– Support cleats: 33” long (from 1×3 pine, 3 pieces)
– Front trim: 36” long (from 1×4 pine, 1 piece)
Step 2: Drill Pocket Holes
1. Use a pocket hole jig to drill holes in the underside of the bench top
2. Drill pocket holes in both ends of all support cleats
3. Drill pocket holes along one long edge of the shoe shelf
Step 3: Assemble the Side Panels
1. Attach support cleats to inside of side panels 3” from bottom
2. Ensure cleats are square and secure with wood glue and screws
Step 4: Connect the Structure
1. Attach side panels to bench top using pocket holes
2. Measure and mark 4” up from the bottom on both side panels
3. Attach shoe shelf to side panels at marked height
4. Secure additional support cleat to back wall area for stability
Step 5: Add Trim and Finishing Touches
1. Attach front trim piece to hide plywood edge of bench top
2. Fill any visible holes with wood filler
3. Sand entire bench progressing from 120 to 220 grit
4. Apply your chosen finish (2 coats minimum)
Step 6: Install the Bench
1. Locate wall studs using stud finder
2. Secure bench to wall through back cleats with 2” wood screws into studs
3. Use appropriate wall anchors for sections without stud support
This design provides comfortable seating while creating storage for 4-6 pairs of adult shoes on the shelf below. For additional shoe storage solutions, explore mudroom bench shoe storage options that might inspire modifications to this basic design.
How to Build a Corner Bench to Maximize Awkward Spaces
Corner benches transform underutilized spaces into functional storage areas, but require precise measurements and cuts.
Step 1: Measure Your Corner Angle
1. Most corners are 90 degrees, but older homes may vary
2. Use an adjustable angle finder to determine the exact angle
3. Transfer this angle to paper to create a template
Step 2: Design Your L-Shape
1. Determine the length of each bench segment (typically 30-36” on each wall)
2. Standard depth remains 16-18” for comfortable seating
3. Plan height at 17-19” including cushion if applicable
Step 3: Create a Sturdy Frame
1. Build two separate bench frames using 2×3 lumber
2. Construct rectangular boxes for each wing of the L-shape
3. Reinforce corner junction with diagonal bracing
4. Add internal supports every 12-16” to prevent sagging
Step 4: Connect the Two Sections
1. Position both bench sections in the corner
2. Join at the corner with pocket hole screws or corner brackets
3. Ensure the connection point is reinforced for stability
4. Check that the entire structure is level and square
Step 5: Add Storage Features
1. Create hinged tops for hidden storage
2. Install dividers for organized compartments
3. Add a shoe shelf near the bottom
4. Consider pull-out drawers for smaller items
Step 6: Attach to Both Walls
1. Locate studs in both intersecting walls
2. Secure bench to walls using 3” screws through back supports
3. Use appropriate anchors between studs for additional security
4. Check stability before finishing
When planning your corner bench, browsing best small benches entryways can provide additional design insights for maximizing these challenging spaces.
Smart Storage Solutions to Integrate with Your Small Bench

Entryway Bench with Cushion, Mudroom Bench with Cushion, Shoe Bench for Entryway
$1,186.63 Select options This product has multiple variants. The options may be chosen on the product page
Coat Rack Shoe Bench, Corner Entryway Bench, Corner Hall Tree, Shoe Bench for Entryway
$313.58 Select options This product has multiple variants. The options may be chosen on the product page
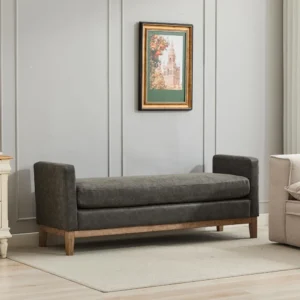
Corner Entryway Bench, Entryway Bench with Cushion, Modern Entryway Bench, Shoe Bench for Entryway
$476.34 Select options This product has multiple variants. The options may be chosen on the product page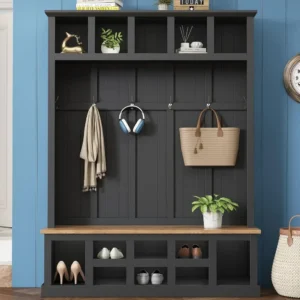
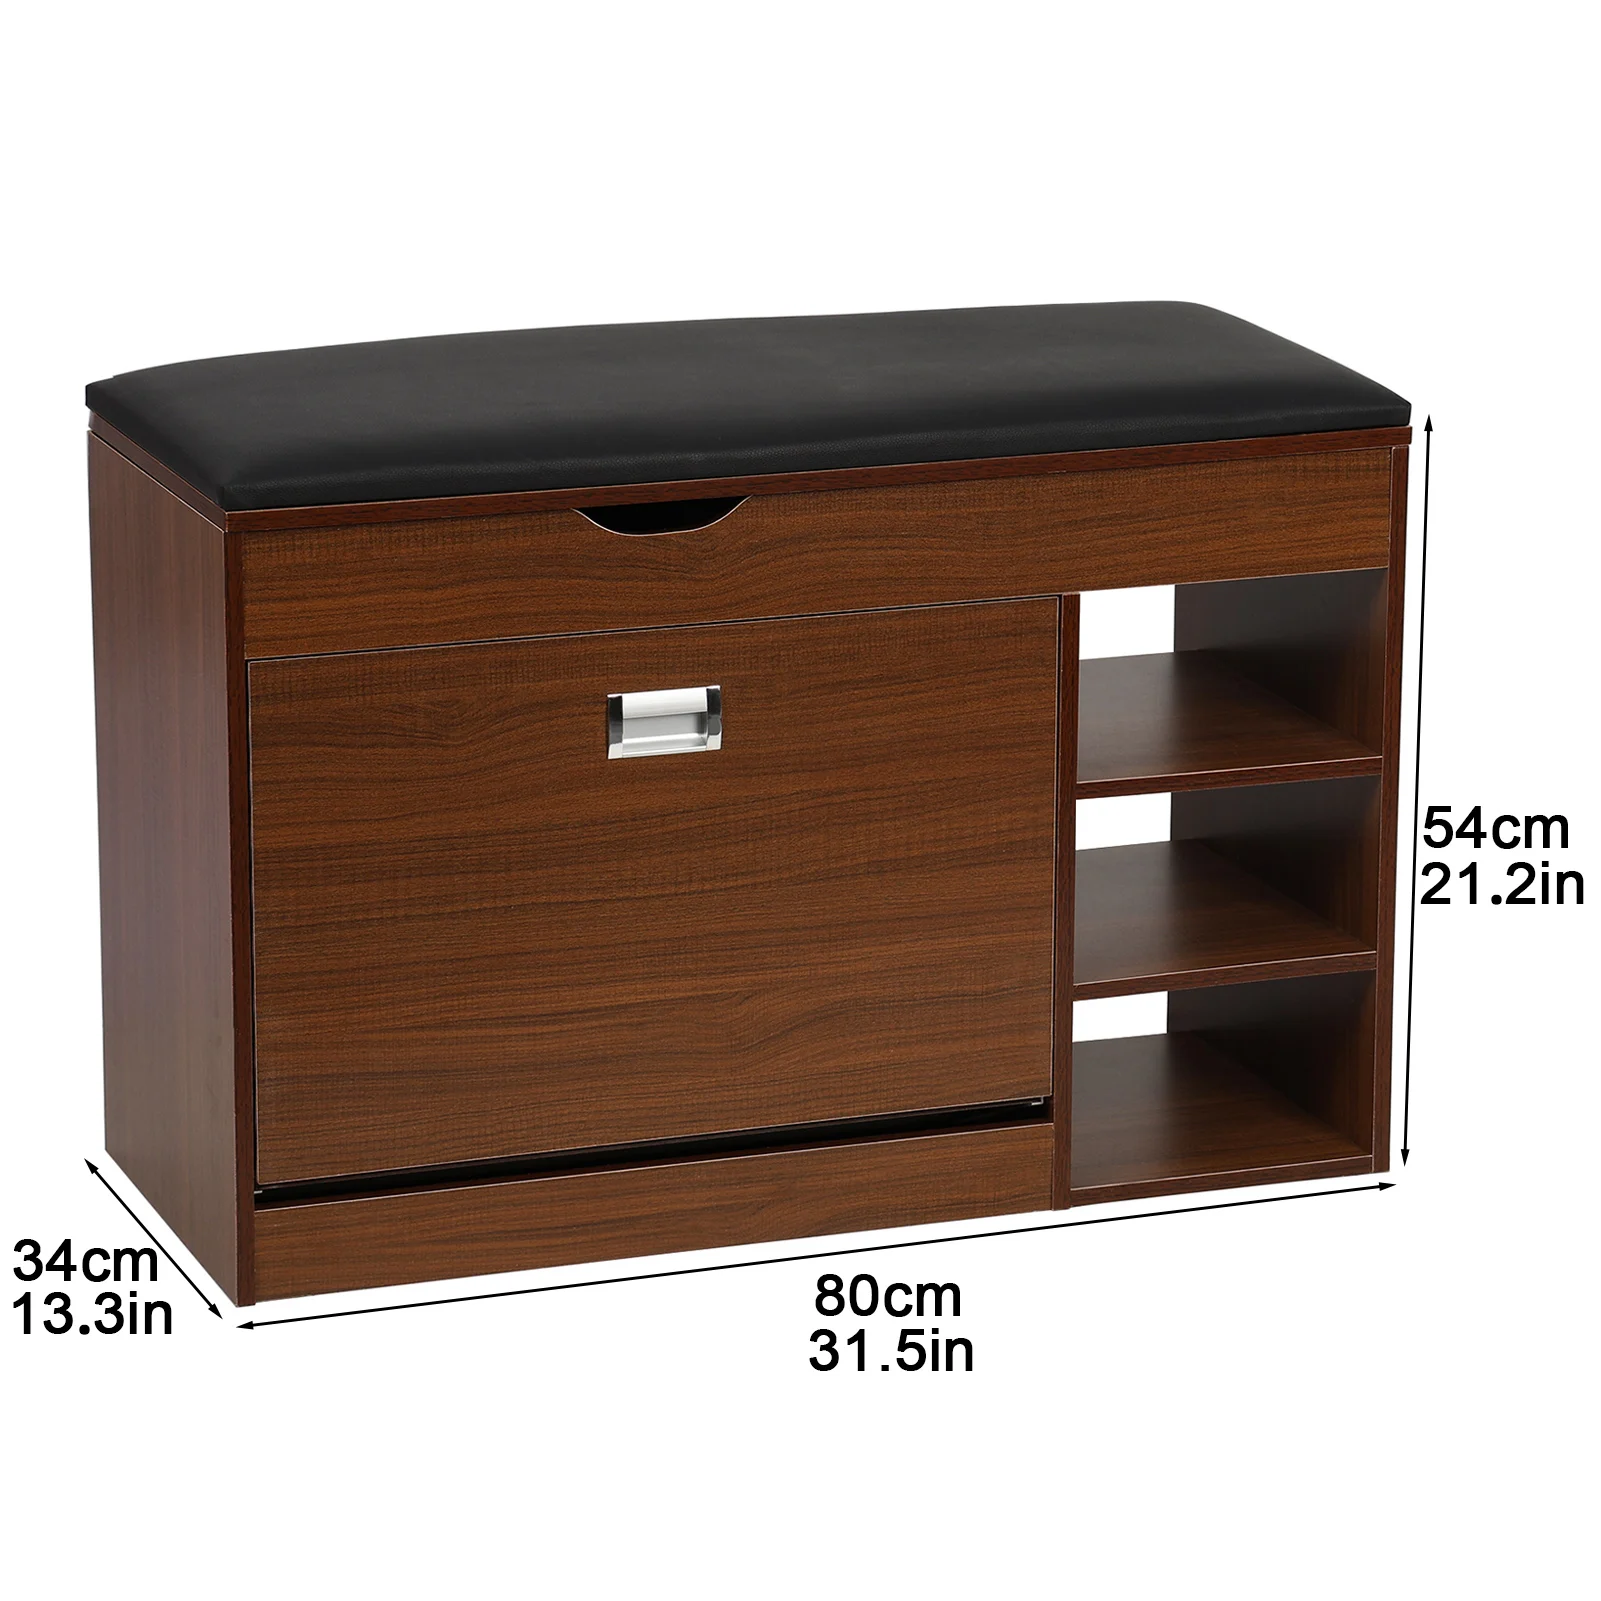
Bench with Hooks and Storage, Entryway Hall Tree, Mudroom Bench with Cubbies, Mudroom Bench with Shoe Storage
$818.38 Select options This product has multiple variants. The options may be chosen on the product page
Modern Entryway Bench, Wood Entryway Bench, Wood Mudroom Bench
$497.69 Select options This product has multiple variants. The options may be chosen on the product page
Entryway Coat Rack Bench, Entryway Hall Tree, Farmhouse Mudroom Bench, Mudroom Bench with Shoe Storage
$805.09 Select options This product has multiple variants. The options may be chosen on the product page
Maximize your mudroom bench’s functionality by incorporating these clever storage solutions:
Vertical Storage Additions
* Wall-mounted hook rails installed 12-16” above bench height
* Floating shelves at 60” height for seasonal items
* Grid systems with customizable hooks and small containers
* Slim cabinets that extend only 6-8” from wall
Under-Bench Organization
* Divided cubbies sized 12” wide for shoes (fits 2-3 pairs per cubby)
* Pull-out baskets on drawer slides
* Labeled bins for different family members
* Toe-kick drawers utilizing the bottom 3-4” of space
Hidden Storage Compartments
* Hinged bench tops with gas lift supports
* Secret compartments behind false fronts
* Integrated drawers that look like decorative panels
* Sliding sections that reveal additional storage
Wall-Mounted Accessories
* Mail organizers and key hooks at eye level
* Magnetic boards for important notes
* Slim umbrella stands that attach to bench sides
* Foldable hooks that recess when not in use
Combining your bench with other entryway bench storage solutions creates a comprehensive system that handles everything from shoes to seasonal items. For homes with particularly challenging dimensions, small home mudroom bench solutions can provide additional inspiration tailored specifically to compact living.
Finishing Touches: Making Your Small Bench Look and Function Beautifully
The finishing details transform your DIY bench from a simple storage solution into a beautiful feature of your home:
Apply a durable finish that stands up to daily wear and moisture. For painted benches, use semi-gloss or satin paint with a water-resistant polyurethane topcoat. Allow 24-48 hours for complete curing before heavy use. For stained benches, apply 2-3 coats of polyurethane, sanding lightly between coats.
Choose colors strategically to enhance your space perception. Light colors (whites, light grays, soft blues) make small areas feel larger, while darker colors can help a bench feel grounded. Consider painting the wall behind the bench a slightly darker shade than the bench itself for depth.
Select hardware that serves both function and space efficiency:
* Low-profile handles that won’t catch on clothing
* Soft-close hinges to prevent slamming in tight spaces
* Magnetic touch latches that eliminate the need for protruding handles
* Multifunctional hardware like hook-handle combinations
Add comfort with appropriately scaled cushions. For narrow benches, look for cushions 2-3” thick to maximize seating comfort without sacrificing too much height. Removable, washable covers in durable fabrics like canvas or outdoor-rated materials stand up to mudroom conditions.
Consider lighting improvements like motion-sensor LED strips under shelves or small sconces above the bench area to illuminate your entryway even in darker months.

For the ultimate finishing touch, entryway bench cushion options can add both comfort and style to your completed project.
5 Real-World Examples of Successful Small-Space Mudroom Benches
1. The 30-Inch Entryway Transformation
A young couple in an apartment converted a tiny 30” wide alcove beside their front door into a complete mudroom solution. Using a floating bench design with two shoe cubbies below and five hooks above, they created storage for two adults in just 30” × 14” of floor space. The bench height at 17” allowed for comfortable shoe changes while a small drawer under the seat stores gloves and scarves.
2. Family-Sized Corner Solution
A family of four maximized an awkward 90-degree corner in their 5’ × 6’ entryway. By building an L-shaped bench with individual cubbies below (labeled for each family member) and a double row of hooks above, they created dedicated storage zones in a previously underutilized space. The bench depth of just 14” preserved plenty of walkway space while still providing functional seating.
3. Under-Stairway Mudroom
A homeowner utilized the triangular space beneath their stairway by creating a graduated-height bench that followed the stair line. The tallest section (36” high) incorporated a coat cabinet while the middle became a bench with drawer storage, and the lowest section (16” high) functioned as dedicated kid-height shoe storage. This solution added mudroom functionality without consuming any additional square footage.
4. Slim Hallway Bench with Vertical Storage
In a 42” wide hallway, a homeowner installed a slim 10” deep bench along one wall. By focusing on vertical storage with hooks, shelves, and a small cabinet above, they created a complete organization system while maintaining a 32” pathway. The bench itself contained no storage but served as essential seating for shoe changes.
5. Convertible Entry Bench
In an extremely tight 3’ × 4’ entryway, a creative DIYer built a hinged bench that folded flat against the wall when not in use. When folded down, it provided a 14” × 30” seating area with shoe storage below, but could be folded up to create additional floor space when entertaining guests. Wall-mounted hooks above remained accessible regardless of bench position.
For more real-world inspiration, browsing small entryway bench options can help you visualize how these solutions might work in your own space.
Are Built-In or Freestanding Benches Better for Very Small Spaces?
When every inch matters, choosing between built-in and freestanding benches becomes crucial:
Built-In Benches create a custom, integrated look and typically save 1-2 inches of space by using existing walls for support. They eliminate gaps where items might fall and can be precisely sized to unusual dimensions. However, they’re permanent fixtures that require more construction skill and may impact home resale if poorly executed.
Freestanding Benches offer flexibility to reconfigure your space as needs change. They can be moved for cleaning and don’t require wall attachment, making them ideal for rental properties. The downside is they typically need more substantial construction to ensure stability and may waste small amounts of space around their perimeter.
For extremely tight spaces under 4 feet wide, built-ins typically maximize efficiency by utilizing wall support to minimize material thickness and eliminate gaps. However, if your space serves multiple purposes or you anticipate moving, a carefully chosen freestanding piece may prove more practical despite sacrificing a small amount of space efficiency.
What’s the Minimum Width for a Functional Mudroom Bench?
The minimum functional width for a mudroom bench depends on its intended use:
For single-person seating, 18-24 inches provides comfortable sitting space. This allows enough room to sit and put on shoes without feeling cramped. For very tight spaces, you can reduce this to a 16-inch minimum, though it will feel noticeably constrained.
For storage functionality without seating, you can create useful organization in as little as 12 inches of width, focusing on vertical storage with hooks above a narrow shelf.
When space is extremely limited, consider these adaptations:
* Corner triangle benches that utilize otherwise wasted corner space
* Wall-mounted flip-down seating that folds away when not in use
* Nesting stools that slide under a shallow shelf when not needed
* Alternating the bench height to create an interlocking design with a neighbor’s space
Remember that comfort and functionality exist on a spectrum—while a wider bench is always more comfortable, even a very narrow solution provides more organization than no mudroom features at all.
Can You Create Mudroom Storage Without a Traditional Bench?
Absolutely! When space constraints make traditional benches impossible, consider these alternatives:
Wall-Mounted Solutions
* Install a shallow shelf (6-8” deep) at seating height with hooks above
* Mount a fold-down seat that disappears when not in use
* Create vertical zones with labeled hooks for each family member
Alternative Seating Options
* Use a narrow stool or ottoman that slides under a console table
* Install a pull-out step that doubles as seating when extended
* Mount a small flip-down seat beside your shoe storage
Hybrid Approaches
* Combine a narrow wall-mounted shoe cabinet with hooks above
* Install floating shelves at varying heights for both display and storage
* Use stackable storage cubes that can be reconfigured as needed
Unconventional Organization
* Repurpose an umbrella stand for storing sports equipment
* Install ceiling hooks for rarely-used seasonal items
* Use over-the-door organizers for mittens, hats, and small accessories
The key is prioritizing your most essential needs and designing a solution that addresses those first, even without a traditional bench. Many homeowners find that hooks and shoe storage are more critical than seating in extremely limited spaces.
By thinking creatively and prioritizing your specific needs, you can create functional mudroom storage in even the most challenging spaces. The team at Nested Goods understands that not every home has room for traditional entryway furniture, which is why we emphasize adaptable, space-efficient solutions that work in real homes.